Deploying Rails on Elastic Beanstalk
Fintan Nagle
September 2021
September 2021
How to deploy a Ruby on Rails app on the Elastic Beanstalk platform from Amazon Web Services. It can be tricky!
In this tutorial, we will look at deploying a bare-bones Rails app to AWS EB. We'll first set up a basic app, test it locally, deploy an EB environment, then deploy our own code and troubleshoot.
If your app crashes on deployment, the problem could be with gem installation, starting the Puma server, starting the Rails app, or in your own logic. Because your own code can be tested locally before deploying, crashes at deploy time are often related to gem installation or the server layer, making them harder to resolve (which is why we always test on a staging environment before deploying to production). Deploying a stripped-down Rails app is a very useful debugging operation.
Notes
We include a Postgres database connection in the stripped-down app; it is useful for the DB connection to be part of the system-under-test, since problems here can crash the app. We use AWS Relational Database Service (RDS) for the production DB. If you don't have a database server set up, leave the app configured for sqlite.
As a project editor, we recommend Sublime Text; you can easily find files with cmd-t (ctrl-p on Windows) and the project can be browsed in the left pane once we have run Add folder to project.
At time of writing the newest Elastic Beanstalk framework version was Ruby 2.7, platform version 3.3.5. If there is now a newer version, we recommend using it.
The sample Rails app is available on Github.
1. Ruby environment
It's a good idea to use the same Ruby version as the server, and the same version of key gems like the Puma server. Otherwise, deploys can break due to gem version conflicts. Check the EB platform versions:

The latest version uses Ruby 2.7.4 and Puma 5.4.0. Let's start by using RVM to install Ruby 2.7.4: rvm install 2.7.4 and then rvm use 2.7.4 . You may have to install a C compiler (GCC, the XCode command line tools or the Visual Studio command line tools) in order to compile recent Ruby versions.
2. Rails app
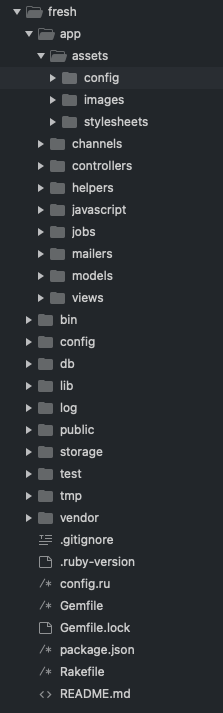
Now let's start a new Rails project called "fresh" with rails new fresh . After opening it in our favourite editor, we can see the Rails project structure:
As this is a minimal test app, we'll remove several frameworks which come with a modern Rails app, including Webpacker (not required if you're using Vanilla JS) as well as Spring, Turbolinks and Bootsnap (which all aim to speed up your app, but can lead to thorny errors as they unpredictably cache your code). Our aim is to deploy the smallest working example. Feel free to leave these features in.
- From
application.html we remove thejavascript_pack_tag , as we won't be using Webpacker. (Don't just comment it out, it will run anyway.) - From
boot.rb we need to delete the line which requires bootsnap/setup. - If there is a
.ruby-version file (which may be invisible), it needs to be deleted, so that the Gemfile alone controls the Ruby version (EB can crash if the.ruby-version is wrong). - In the Gemfile, we need to update the ruby version to
ruby '2.7.4' , then deletewebpacker ,turbolinks ,jbuilder ,bootsnap ,spring , andspring-watcher-listen . - We need to specify the Puma version:
gem 'puma', '5.4.0' , the same version EB is using. - Remove the
sqlite gem and replace withgem 'pg' , as we will be using Postgres.
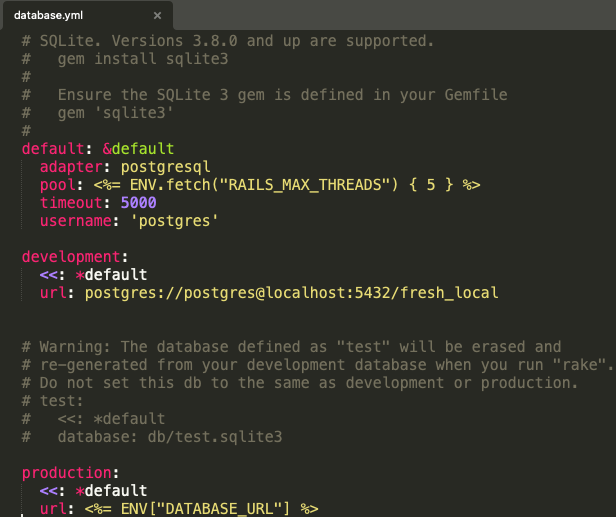
For local testing, our app needs a DB connection. In database.yml , remove sqlite and configure some hard-coded credentials for the local development environment. In production, they will be read from an environment variable. database.yml now looks like this:
We also need to run CREATE DATABASE fresh_local; in our local PSQL console, and CREATE DATABASE fresh_production; on our production Postgres server. We can easily provision a Postgres server on RDS, ensuring that we note the username, password and host as well as allowing public access. We can then log into it with PSQL: something like PGPASSWORD=mypassword; psql -h my-database-server.cvhds.eu-west-1.rds.amazonaws.com -U username -d postgres .
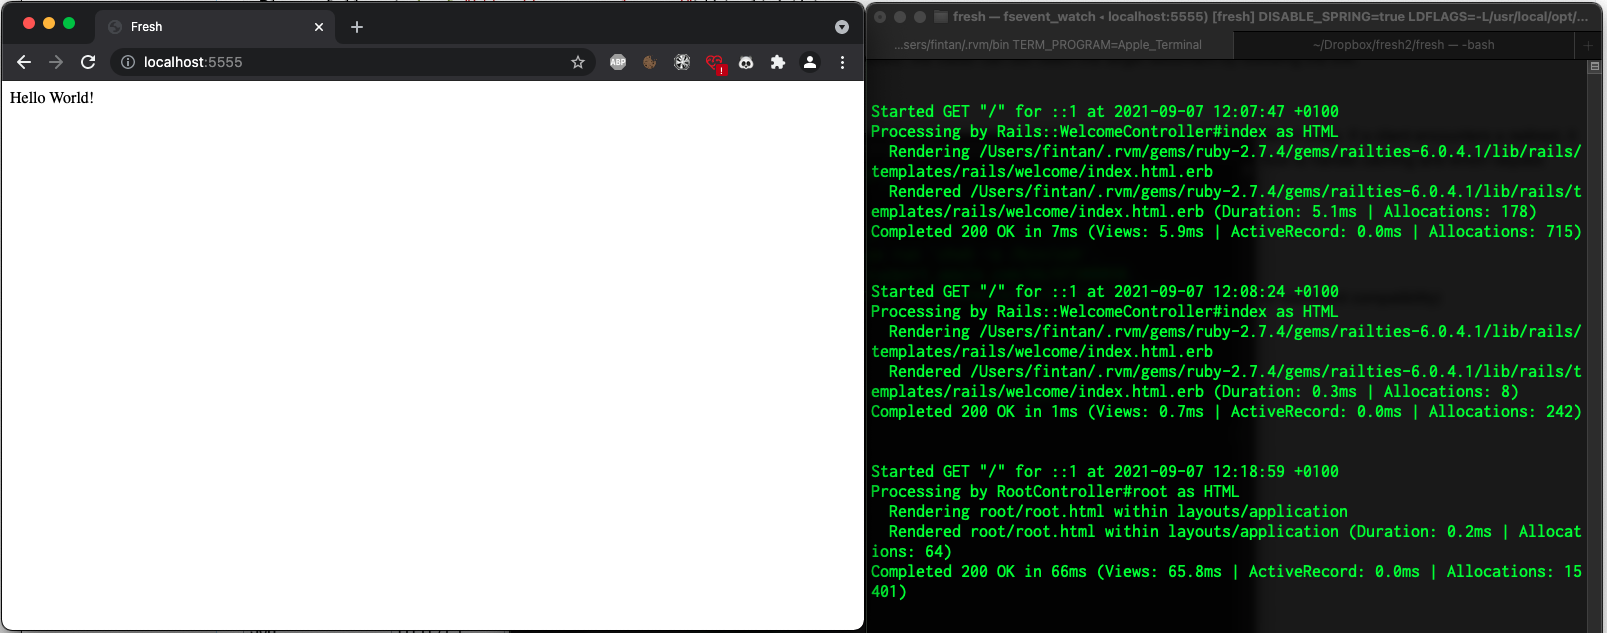
Now we can start the server on port 5555 using rails s -p 5555 : the app should start fine. Then we can check localhost:5555 in the browser:

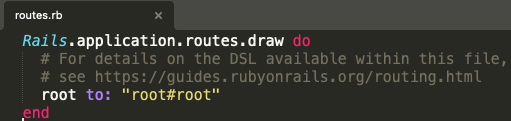
Before deploying our app to EB, we need to add a real route route; the ELB (Elastic Load Balancer) requires a 200 (not a 301 redirect!) to see that the application is healthy. The "You're on Rails!" default page will cause errors. First, we define the root route in routes.rb :
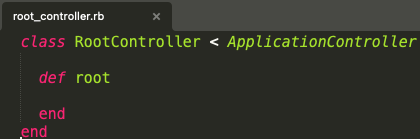
Then we can run rails g controller root to generate a controller called RootController. In root_controller.rb we define an empty root function:
Finally, we make a minimal HTML file and save it under views/root/root.html :

We can now refresh the app to check it says "Hello World":
Now the app is ready to deploy to EB!
3. Elastic Beanstalk application
Let's start a new Elastic Beanstalk application. We could do this from the command line using eb create . but that doesn't allow us to easily set options like instance size and SSH access, and it's troublesome to change these later as they require replacing our instances, which takes about ten minutes. Let's make a new application called fresh-app .
Now let's create a new environment within this application. Click create environment and select a web server environment. We can call the environment fresh-app-production and configure it as follows:
- Platform: Ruby 2.7 version 3.3.5
- Application code: sample application.
- Then click on configure more options
- Under Software, set the
DATABASE_URL environment variable to your Postgres URL, which will look something likepostgres://username:password@my-postgres-server.eu-west-1.rds.amazonaws.com:5432/fresh_production - Under Capacity, set the environment type to load balanced (a load balancer is required for HTTPS). Set the instance type to
t3.small (note that this instance type is not in the free tier) - instance size
t3.small , which is not in the free tier but will run a little faster (you can also use a smaller instance type in the free tier). - Optional: if you have a domain name set up in Route 53 and an HTTPS certificate with AWS Certificate Manager, you can add an HTTPS listener under Load Balancer.
- Under Rolling Updates and Deployments, set Rolling update type to Disabled (this turns off rolling deployments, speeding up the deployment process). Also set Ignore health check to True so that instances with errors aren't automatically replaced; we will need to inspect the errors!
- Under Security, set EC2 key pair to an SSH key to SSH access on: this is a vital fault-finding tool. If you have not done so already, you will need to upload an SSH key to AWS.
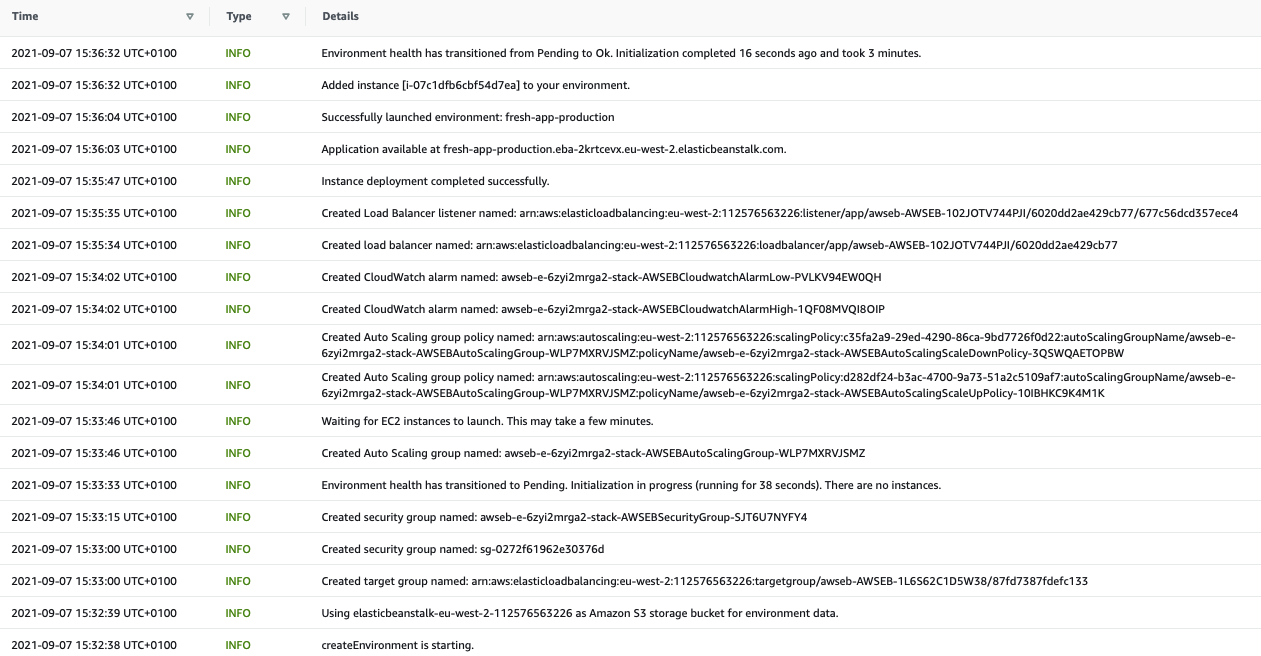
Once you have checked the configuration, click on Create environment. The process should take about 10 minutes. Once the environment is running, click on its URL (something like fresh-app-production.eba-fpfg63g.eu-west-2.elasticbeanstalk.com ). You should see the AWS welcome page, which is a simple Sinatra application:

4. Deploying the sample app
To deploy our app to EB, we will need the EB command line tools installed.
Let's start by running git init in the fresh folder
git init
git add .
git commit -m 'first commit'
We can now run eb init --interactive to set the fresh folder up with EB.
- Select your local region.
- Select the application you just created (
fresh-app ). - Confirm using Ruby; choose the latest platform version (Ruby 2.7). Don't use the older Puma or Passenger versions.
- Select No to CodeCommit.
- Select Yes to SSH and select your key pair.
Run eb list . You should see the environment you previously created (fresh-app-production ). Run eb open to visit the app, and check that it is still running the AWS sample app.
Now we can deploy our own app: run eb deploy fresh-app-production . Be aware that EB only deploys the last Git commit: if you have any uncommitted changes, they will not be deployed!
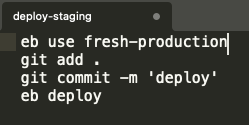
It can be very useful to automate this with a short Bash script which makes sure you are using the correct environment, then commits and deploys. We can use a pair of such scripts to deploy easily to production and staging (e.g. ./deploy-staging ).
In this case, our deploy fails!
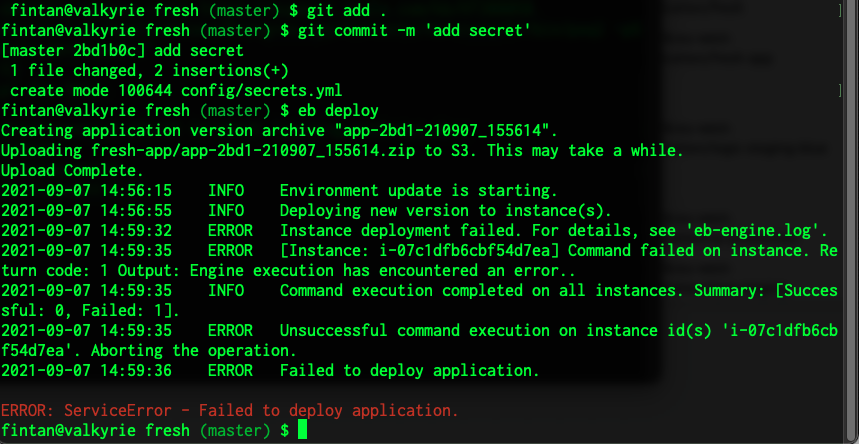
This is a common occurrence when upgrading to a new EB platform version, even with the Rails sample app. Let's do some troubleshooting.
First, run eb use fresh-app-production so that we don't have to keep specifying the environment. Then run eb ssh and type yes . You should now be logged into the EC2 instance:

There are several key logfiles we should check. First run cat /var/log/eb-engine.log to check the Elastic Beanstalk deployment engine. Looking through the log, we can see EB downloading the app package and installing gems. It then encounters an error during asset precompilation, when it tries to start the Rails app:
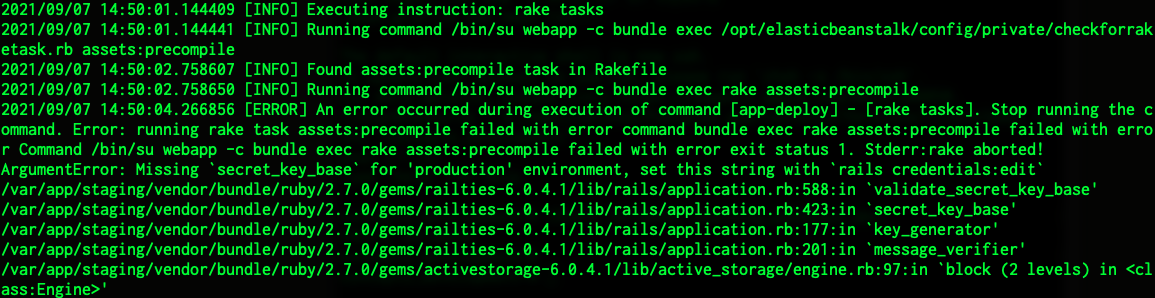
Oops - we omitted to set the production secret. We can address this error by saving secrets.yml in the app's config folder. Then we can run git add . and git commit -m 'bugfix' , and try to deploy again with eb deploy .
This time, the deployment claims it worked:

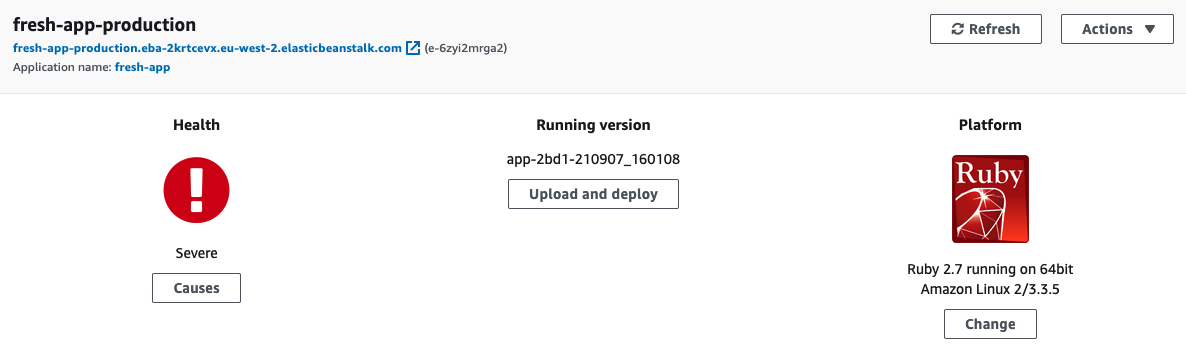
However, remember that we turned off post-deployment health checks. If we look at the app, it actually returns a 504, and the EB console knows that something is wrong:
Checking /var/log/eb-engine.log doesn't help this time; it just shows us that the deployment finished successfully. Let's move to the app directory on the instance with cd /var/app/current . From here, we can check the Rails log: cat /log/production.log , but there are no errors there.
Let's try to start Puma: pumactl start . We can see that Puma tries to start, but encounters an error:
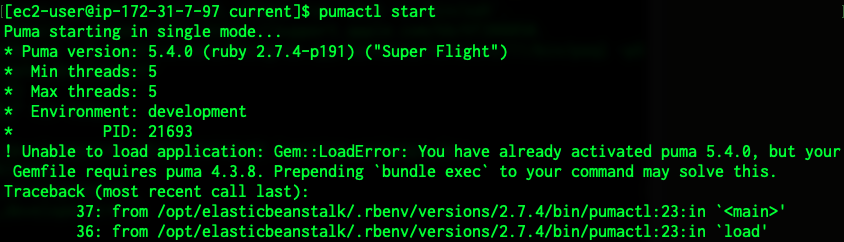

There is a mismatch between Puma 5.4.0 (used on the newest EB platform) and Puma 4.3.8 (required in our Gemfile). Let's change this to gem 'puma', '5.4.0' , then run bundle install to update the Gemfile.lock (this step is vital, or EB will still try to install the old version). Then we can run git add . , git commit -m 'bugfix2' , and eb deploy again.

This time, the app deploy worked, the EB console is green, and the app is working!
4. Conclusions
We demonstrated how to modify the default Rails app so that it serves as a test app for AWS Elastic Beanstalk - or a starting point for your own app. Once we connected to the instances via SSH, one error was detected in /var/log/eb-engine.log , then another by moving to the application directory /var/app/current and running pumactl start .
The sample project is available on Github.